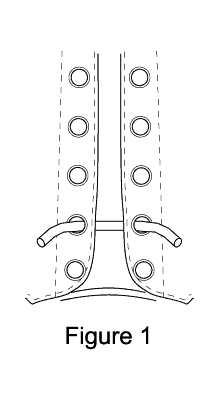


The spiderweb lacing is a really impressive looking lacing, when used properly. The spiderweb is best displayed when the boot tightens around the ankle with some gap between the two eyelet rows, as shown in this image. Those with little stick legs (like myself) will want to consider thick socks and/or tucked-in pants to accomplish this.
Since this lacing is bilaterally symmetrical (i.e. same left and right), I am not making a distinction between lace ends (as I did with the ladder lacing).
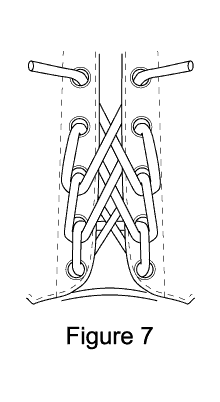
To tighten the laces, pull upwards simultaneously on the diagonals created in steps 5 & 6 starting at the bottom of the lacing and working upwards.
| Step 1: Begin by passing each end of the lace through eyelet pair 2 under to over. (This was the hardest thing to figure out when I was trying to deconstruct the lacing from photographs.) | |
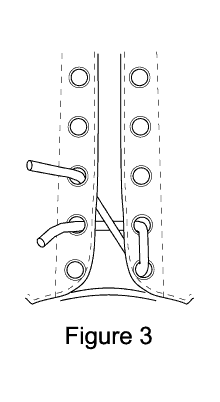
| Step 2: Pass one end of the lace down through eyelet one (not crossing), over to under. | |
| Step 3: Pass the same lace across and up through eyelet three, under to over. | |
| Step 4: Repeat Steps 2 & 3 for the other lace end. | |
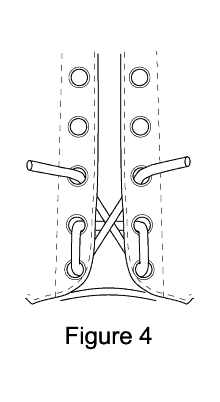
| Step 5: Pass one end of the lace down and loop through the vertical made in Step 2, out to in; then pass the end of the lace up and across through eyelet 4, under to over. | |
| Step 6: Repeat Step 5 for the other lace end. | |
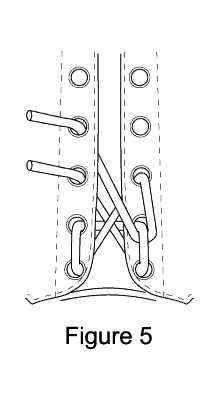
| Step 7: Continue repeating Steps 5 & 6 until the lace ends pass through the top pair of eyelets. | |
| Tie the laces. I certainly hope you can do that without help from me. Tucking the laces into the tops of the boots, in my opinion, looks much better than leaving the bunny ears hanging. | |
Return to the Boots Page